Micro-Finishing and Surface Textures
- Jul 13, 2011
- 3 min read
Updated: Apr 30, 2022
Dave Davidson | Deburring and Surface Finishing Specialist | ddavidson@deburring-tech-group.com
The role of mass finishing processes as a method for removal of burrs, developing edge contour and smoothing and polishing parts has been well established and documented for many years. These processes have been used in a wide variety of part applications to promote safer part handling (by attenuation of sharp part edges) improve the fit and function of parts when assembled, and produce smooth, even micro-finished surfaces to meet either functional or aesthetic criteria or specifications. Processes for developing specific edge and/or surface profile conditions on parts in bulk are used in industries as diverse as the jewelry, dental and medical implant industries on up through the automotive and aerospace industries.
Less well known and less clearly understood is the role specialized variants of these types of processes can play in extending the service life and performance of critical support components or tools in demanding manufacturing or operational applications. Industry has always been looking to improve surface condition to enhance part performance, and this technology has become much better understood in recent years. Processes are routinely utilized to specifically improve life of parts and tools subject to failure from fatigue and to improve their performance. These improvements are mainly achieved by enhancing part surface texture in a number of different, and sometimes complimentary, ways.
To understand how micro-surface topography improvement can impact part performance, some understanding of how part surfaces developed from common machining, grinding and other methods can negatively influence part function over time. A number of factors are involved:
Positive vs. Negative Surface Skewness. The skew of surface profile symmetry can be an important surface attribute. Surfaces are typically characterized as being either negatively or positively skewed. This surface characteristic is referred to as Rsk (Rsk – skewness – the measure of surface symmetry about the mean line of a profilometer graph). Unfinished parts usually display a heavy concentration of surface peaks above this mean line, (a positive skew). It is axiomatic that almost all surfaces produced by common machining and fabrication methods are positively skewed. These positively skewed surfaces have an undesirable effect on the bearing ratio of surfaces, negatively impacting the performance of parts involved in applications where there is substantial surface-to-surface contact. Specialized high energy finishing procedures can truncate these surface profile peaks and achieve negatively skewed surfaces that are plateaued, presenting a much higher surface bearing contact area. Anecdotal evidence confirms that surface finishing procedures tailored to develop specific surface conditions with this in mind can have a dramatic impact on part life. In one example the life of tooling used in aluminum can stamping operations was extended 1000% or more by improved surface textures produced by mechanical surface treatment.

LEFT: (Before) These photographs were taken with an electron microscope at 500x magnification. It shows the surface of a raw unfinished “as cast” turbine blade. The rough initial surface finish as measured by profilometer was in the 75 – 90 Ra (μin) range. As is typical of most cast, ground, turned, milled, EDM and forged surfaces this surface shows a positive Rsk [Rsk – skewness – the measure of surface symmetry about the mean line of a profilometer graph. Unfinished parts usually display a heavy concentration of surface peaks above this mean line, generally considered to be an undesirable surface finish characteristic from a functional viewpoint.]
RIGHT: (After) These SEM photomicrographs (500X magnification) was taken after processing the same turbine blade in a multi-step procedure utilizing orbital pressure methods with both grinding and polishing free abrasive materials in sequence. The surface profile has been reduced from the original 75 – 90 Ra (μin.) to a 5-9 Ra (μin.) range. Additionally, there has been a plateauing of the surface and the resultant smoother surface manifests a negative skew (Rsk) instead of a positive skew. This type of surface is considered to be very “functional” in both the fluid and aerodynamic sense. The smooth, less turbulent flow created by this type of surface is preferred in many aerodynamic applications. Another important consideration the photomicrographs indicate is that surface and subsurface fractures seem to have been removed. Observations with backscatter emission with a scanning electron microscope (SEM) gave no indication of residual fractures…
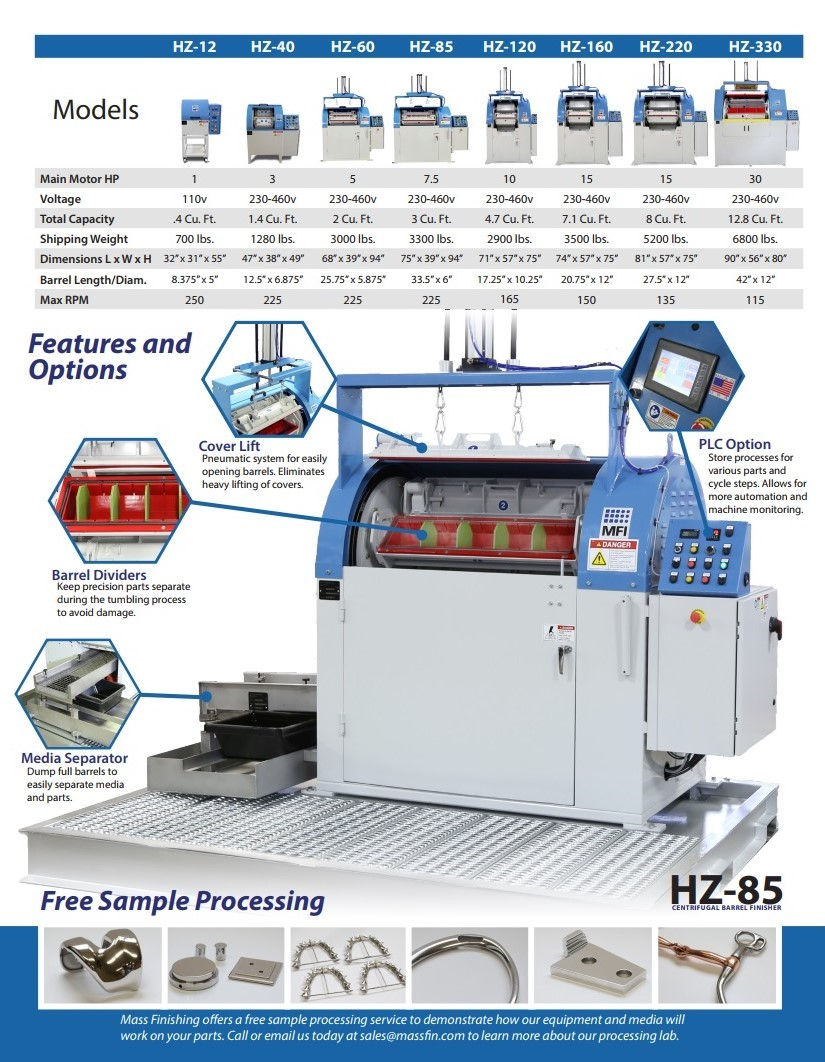
Above: Isotropic Surfaces can be created by processing with Centrifugal isotropic finishing in equipment similar to the Model HZ-60 Centrifugal iso-Finishing machine shown in the video above. For sample part finishing your parts contact Dave Davidson at ddavidson@deburring-tech-group.com


Centrifugal Iso-Finishing Part examples are shown in the photo gallery below:


Comments